
Hello, world, and welcome to Geek Chic! Over the next few weeks, we'll be teaching you to give your blog a head-to-toe makeover. We want to pull away from Template Designer and get you familiar with that "Edit HTML" button. The easiest way to do this is by using the Minima template - it's the original Blogger design, and the HTML is much simpler than in any of the newer templates, making it even simpler to customize.
The one scary thing about Minima is that you can't use Template Designer for most of it. It won't let you upload background images, add or subtract new columns, or change the widths with a slider. But no worries! You'll learn how to do all this and more the old-fashioned way, straight into your blog template. Who's excited? We are!
If you want to redesign your blog, you might want to start by making a test blog. You can mess up the design on a test blog as much as you want, and it won't matter, because nobody will read it! Let's get started.
First off, if you want to install Minima, you'll get a little frustrated with the new Blogger layout. It's just not as designer-friendly as the old version. To fix this, just click the little gear in the top right corner of your dashboard, and click the link to go back to the old interface.
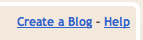 Now, somewhere near the top right of your dashboard, you should see a link to Create a Blog. Click on it! You can name your blog "test blog" and pick any random URL that you'd like. It doesn't matter.
(click on any image to view larger)

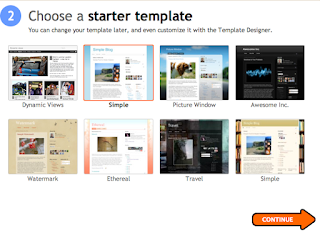
It'll ask you to choose a template - but no Minima here! Just select Simple for now.

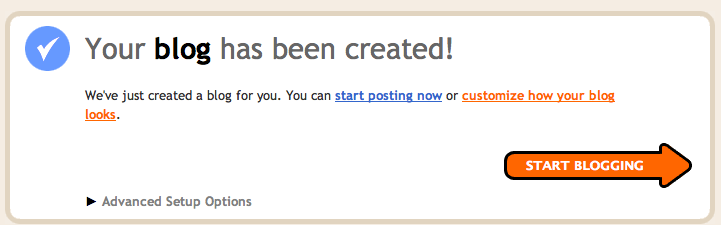
Why yes, we do want to customize how our blog looks!
That link takes us back to Template Designer, but what we really want to do is click Back to Blogger and start editing that HTML code.


The one scary thing about Minima is that you can't use Template Designer for most of it. It won't let you upload background images, add or subtract new columns, or change the widths with a slider. But no worries! You'll learn how to do all this and more the old-fashioned way, straight into your blog template. Who's excited? We are!
If you want to redesign your blog, you might want to start by making a test blog. You can mess up the design on a test blog as much as you want, and it won't matter, because nobody will read it! Let's get started.
First off, if you want to install Minima, you'll get a little frustrated with the new Blogger layout. It's just not as designer-friendly as the old version. To fix this, just click the little gear in the top right corner of your dashboard, and click the link to go back to the old interface.
Now, somewhere near the top right of your dashboard, you should see a link to Create a Blog. Click on it! You can name your blog "test blog" and pick any random URL that you'd like. It doesn't matter.(click on any image to view larger)


It'll ask you to choose a template - but no Minima here! Just select Simple for now.
Why yes, we do want to customize how our blog looks!
That link takes us back to Template Designer, but what we really want to do is click Back to Blogger and start editing that HTML code.


On the Edit HTML page, scroll down to the bottom and find the Old Templates section. Click "Select Layout Template."

(in case you were wondering, the classic template is Minima without the option to add and edit widgets. scary!)

Select the first template, Minima, and click Save.
And you're done! You can mess around in Template Designer a little, but you'll find there isn't really much to do.
Stay tuned for tutorials on how to start customizing your new Minima template!

Yay! I can't wait to get this blog up and going! :)
ReplyDeleteMe either! Ooh, I like the reply/delete buttons :)
DeleteI was wondering if you guys would take other contributors... I've been designing for some time, and if you want to see what I can do, check out the design on my blog
ReplyDeletehow do you do this with the new blogger template?
ReplyDeleteAs of right now, I don't think there is a way to install it with the new interface. I've tried searching for other tutorials online and I can't seem to find any! Hopefully Blogger will make some changes to re-allow template uploads.
DeleteHopefully! I've heard that it is superduper easy to work with!
DeleteWow this blog is wonderful i really like reading your articles. Stay up the good work! You know, a lot of individuals are looking round for this info, you can help them greatly.
ReplyDeletewebsite design