
creating a header for you blog is quite simple actually, and it's a good way to use your creativity! you can have many different types of headers and today, i'm going to show you how to create headers with fancy fonts using pixlr picture editor.
1. first, you'll need to go to pixlr.com and click on 'open photo editor'

then on the next screen, click 'create a new image' which will pop up a little box with the preset width and height. you will need to change the width to somewhere around 1000 depending on the size of your blog and a height of 200 (you can make it bigger if you want to).
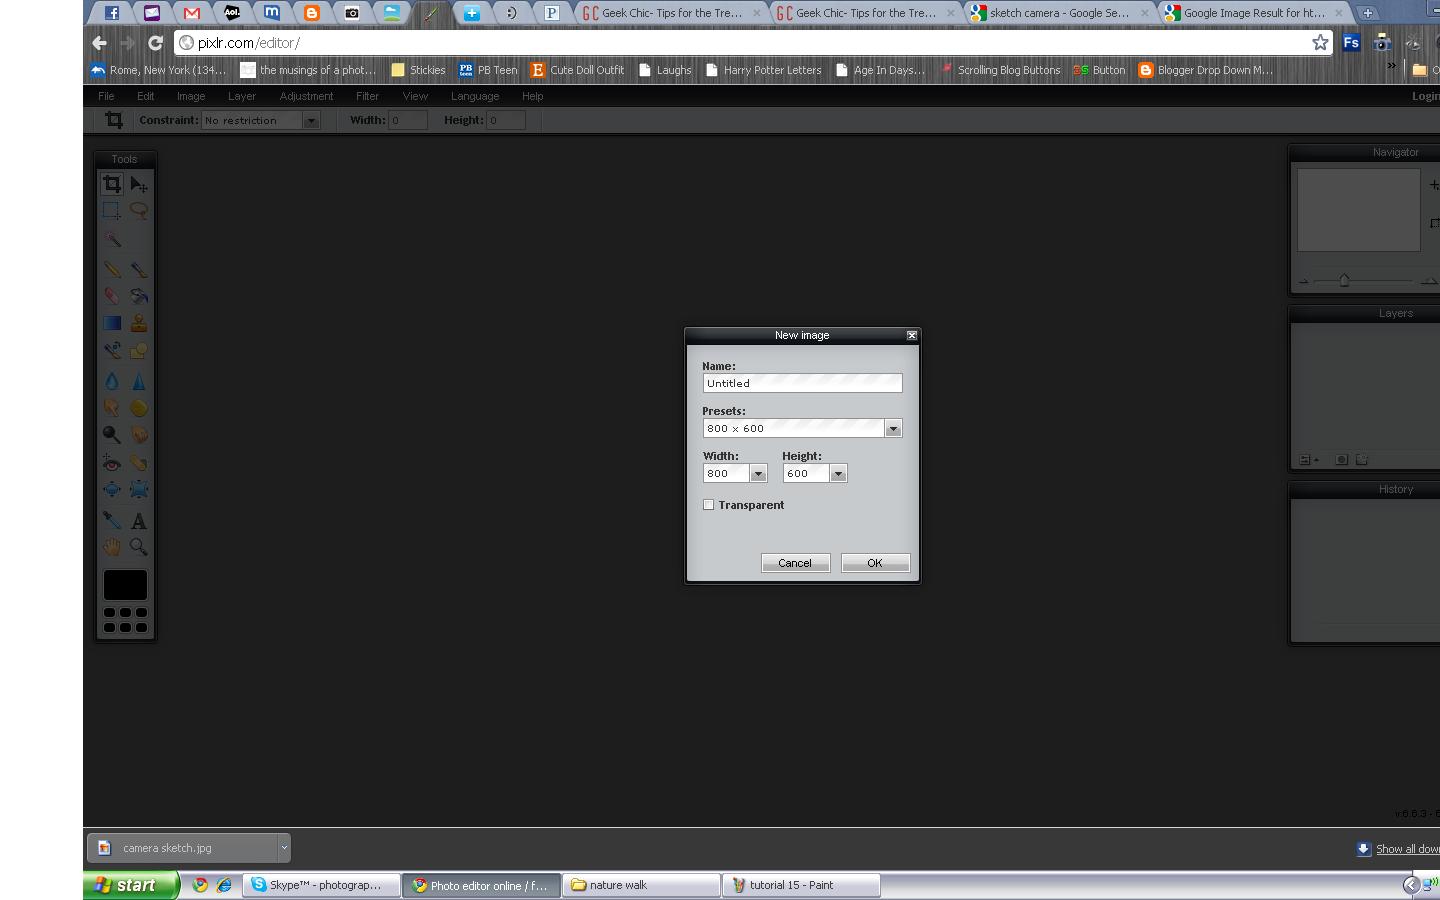
2. you should see this pop up:

now, when it does that, you are only seeing a certain percentage of the actual header. you CAN work with that if you want to, and the quality will be the same once it's 100%, but it will give you an idea if it's big enough for you blog, or TOO big if you change the percentage to 100%. then you will be viewing the whole thing instead of 84% of it.
depending on what size your computer screen is, you may not want to do this because you'll have to scroll back and forth a lot. but if it DOES fit on your computer screen i encourage you to do that by...
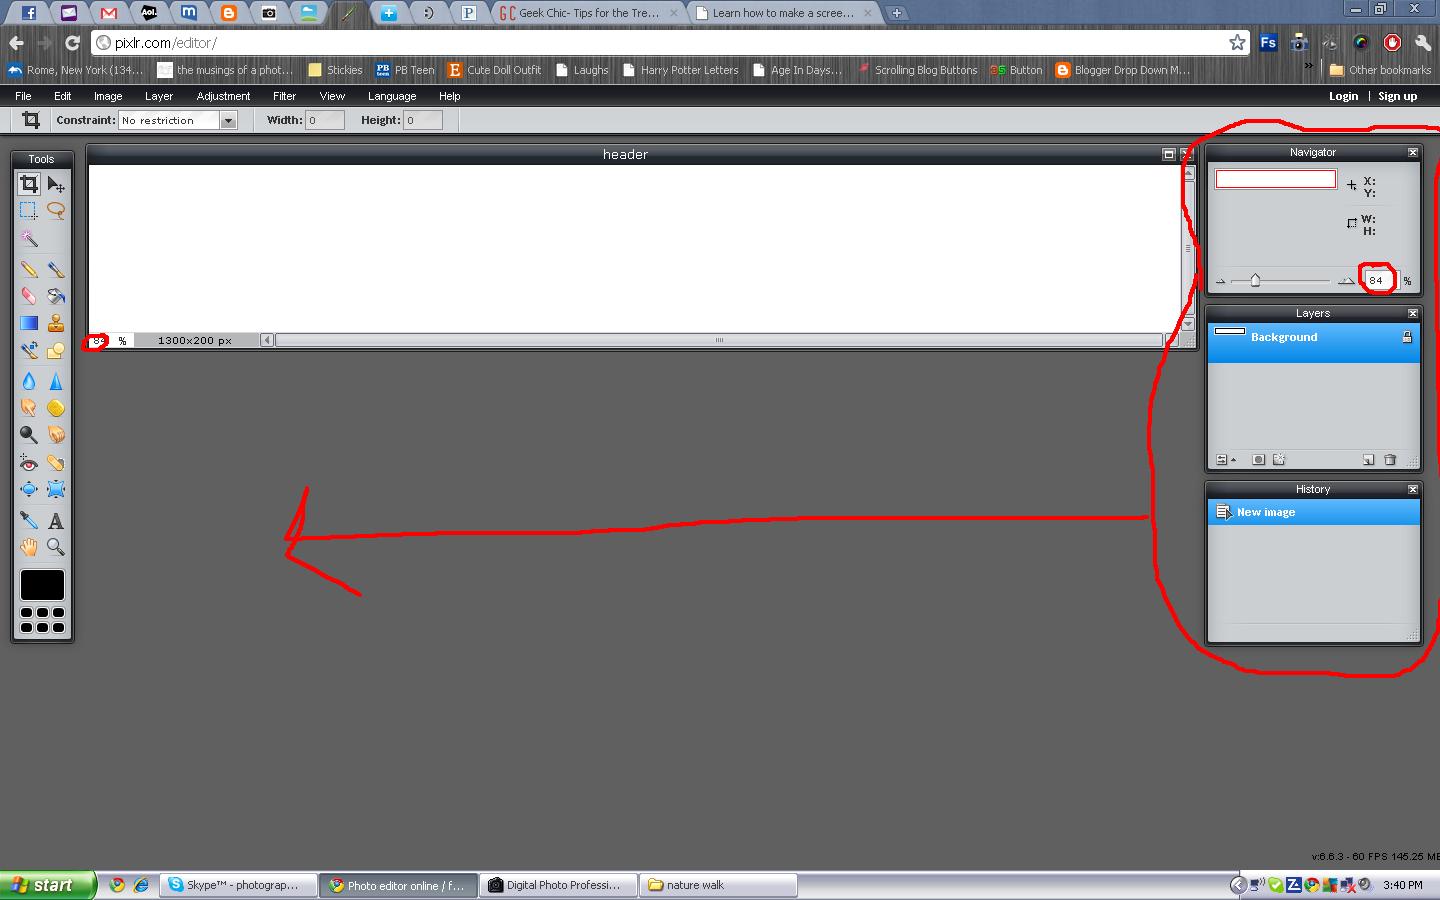
dragging the 3 menus to the lower part of the screen and then (using the first menu) change 84% to 100%. after you've done that your screen should look something like this:
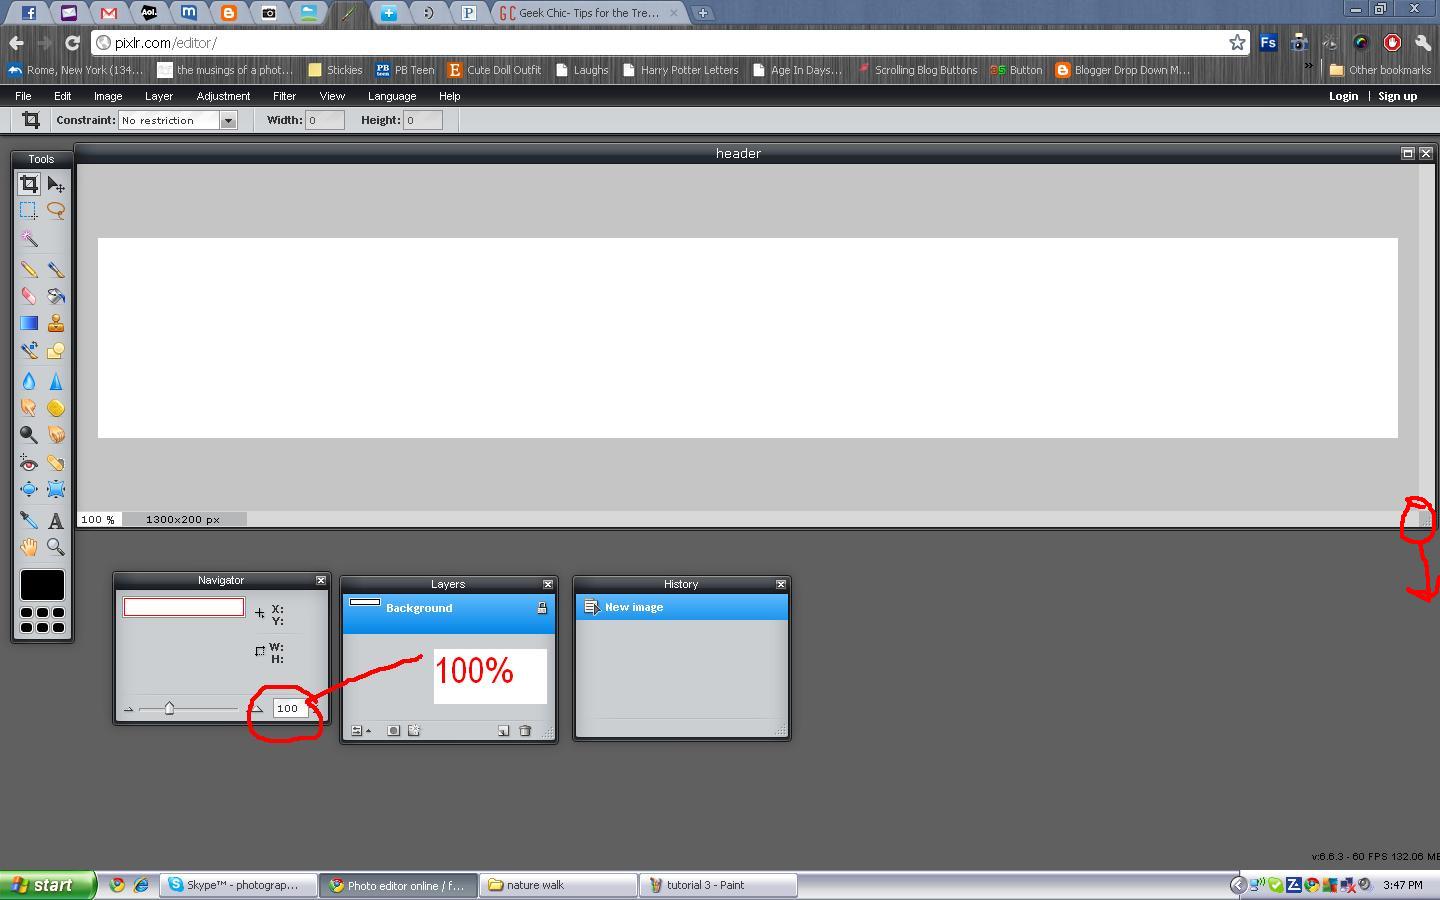
be sure that you've dragged the bottom right corner of the work area out so that you can see all of the white area.
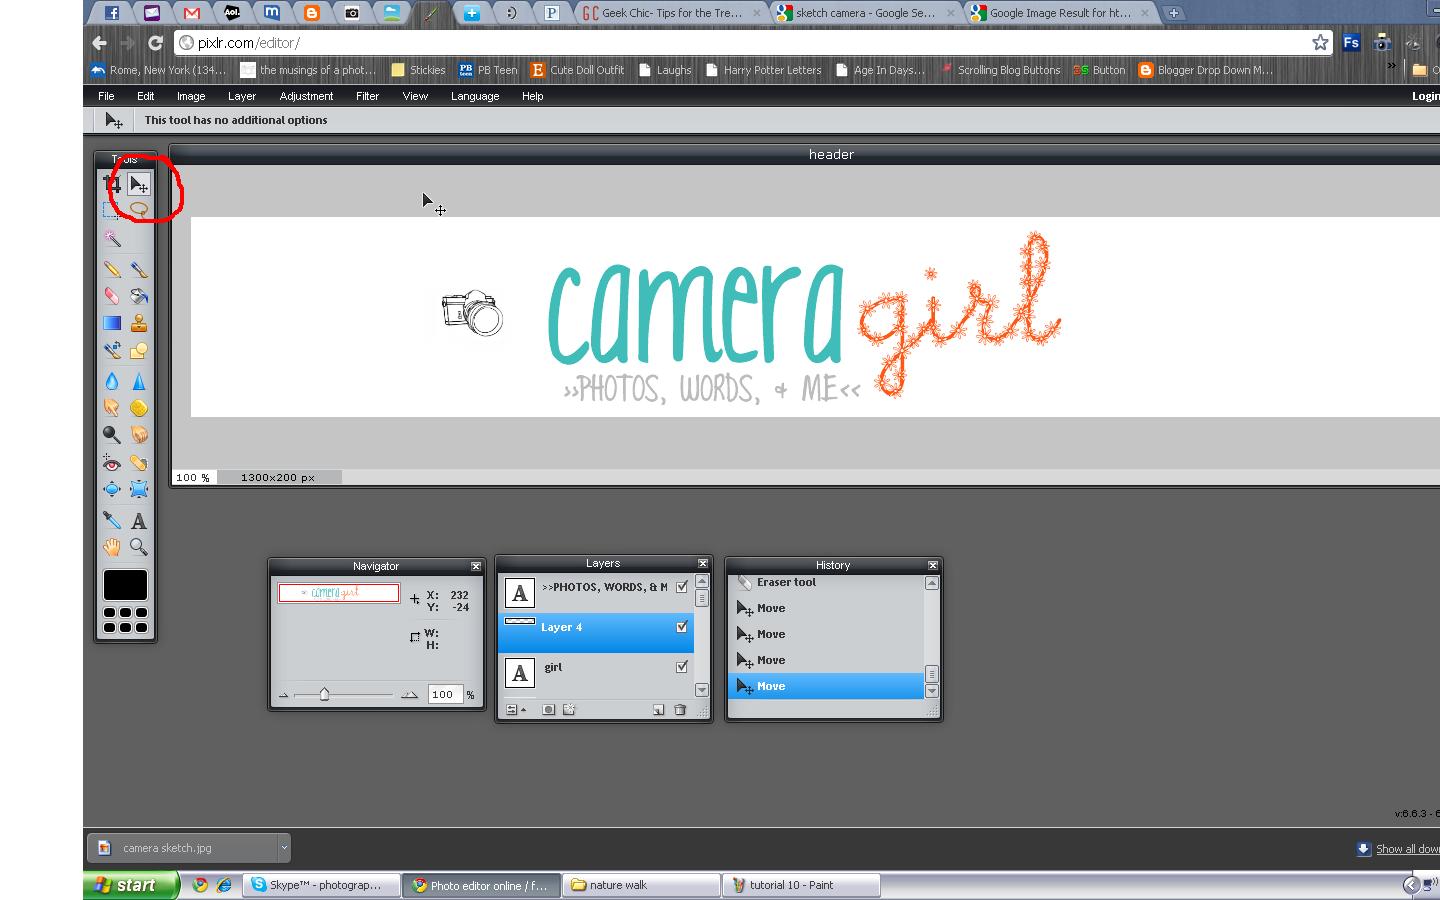
3. to add text, click the 'A' on the toolbar on the left side of the screen. then click anywhere in the white area (you can move it around after).

then you can change the font, font size, font style (bold, italic), and font color using the menu that has popped up.
4. the fonts that appear in the drop down menu, are all the fonts provided by pixlr AND any extra fonts that you've downloaded on your computer. now, once you have all the fonts that you want, you'll want to move them around right? well it's not as simple as you would think. you have to use the menu on the bottom that is labeled 'layers'. you'll see that everything you've written, has it's own layer. so whatever layer you want to move, just select that layer.

once you have everything where you want it to be, you can add a picture (or a few) if you want to by going to the file menu at the top of the screen and clicking 'open image'.

5. before you open an image, you'll want to save your image if it isn't already saved. for example, if you are getting an image of of google images then you'll need to save it before you put it on your header. once you've opened your image in pixlr. you MAY need to resize it so that it fits on your header.

to do that, go to the image menu at the top of the screen and click 'image size'. your screen will look like this:

just change the height and width so that it will fit where you want it to go on your header.
6. once your image is the right size, you'll need to save it again. then go to the layer menu at the top of the screen and click 'open image as layer'.

then, use the arrow to move your picture around to the desired spot.

7. once you have everything in the right place, you'll want to flatten it, and save it. when you flatten it, you're basically gluing all the layers together, so you won't be able to move them around anymore.

once you've flattened your image, you can save it by going to the file menu at the top of the page, and clicking 'save'.

the you can name your header, and save it so that you can upload it to your blog!

hope this helps! if you have any questions, feel free to comment!

Thank you so much for this, Francesca! I made a header as I went through this tutorial and put it on my 365 blog. :)
ReplyDeleteThank you!! No, THANK YOU!!!!! :) I have been searching for this info for a long time. :)
ReplyDeleteBlessings,
-Mikailah @ www.maid4him.blogspot.com
I love love your tutorials. i really hope you have more coming. im sooo lost with coding. id also love to see more tutorials about good "free" sites to get images from for example cupcakes, hearts...etc
ReplyDeletealso if you can do some easy tutorials for favicons, and how to make cute side bar titles. i look forward to more posts from you :)
Thank you
www.herbakingplace@hotmail.com
Once you have designed and completed the header...how do you upload it to your blog?
ReplyDeleteJust open your blog's layout page and click Edit on your header widget (or add the widget if you don't have one yet), then upload the photo :)
DeleteI just found this in a link party and book marked it to go through later. Thanks so much! I'm new to blogging and need all the help I can get.
ReplyDeletewebsite design
Thank you for this tutorial! It was helpful, but I did find it just a touch out of date. Some things, like inserting pictures didn't do for me like they did for you. Bummer. Still, I will refer back to it if needed. Thanks again!
ReplyDeletethanks a lot! the tuto does help me a lot!
ReplyDeletesmm panel
ReplyDeletesmm panel
İŞ İLANLARI BLOG
instagram takipçi satın al
hirdavatciburada.com
BEYAZESYATEKNİKSERVİSİ.COM.TR
servis
Tiktok Para Hilesi İndir
kadıköy samsung klima servisi
ReplyDeletekadıköy mitsubishi klima servisi
üsküdar samsung klima servisi
tuzla mitsubishi klima servisi
çekmeköy vestel klima servisi
ataşehir vestel klima servisi
ataşehir bosch klima servisi
ataşehir arçelik klima servisi
çekmeköy beko klima servisi